In this article, we will describe how to create a search form similar to the one used on the Amazon store.

Why Amazon?
Well, it is a very popular site, and its owner definitely knows a lot about user conversions and how to optimize every part of the site for that. So it’s the place where the best eCommerce practices are applied—and a great reference if you want to implement something truly effective.
As a search plugin, we will use the Advanced Woo Search plugin. This is a powerful search plugin that includes features like live search, search filters, and customizable search results views—everything needed to create an Amazon-like search experience.
The result will be a search form for your site that looks similar to Amazon’s and behaves in the same way.

Amazon Search Form: What Parts It Consists Of
Let’s look at the Amazon search form more closely: what elements it includes, how search results look, and what extra features it offers.
1. Search Field

First, it’s a search field with a submit button that includes a magnifying glass icon.
This is a default look for almost all search forms on eCommerce sites—search field, some placeholder text, and a submit button. We just need to remember the style—submit button background color, search field text color, and font—to later reproduce it for our WooCommerce shop.
2. Search Form Filters

On the left side of the search field, there’s a filters button that allows site visitors to limit results to specific categories.
Clicking on this button reveals a large list of available categories.
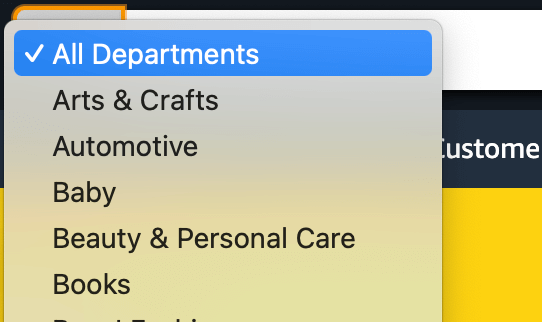
If the customer types something in the search field and then changes the filter, the search form automatically re-runs the search and outputs new results relevant to the selected category.
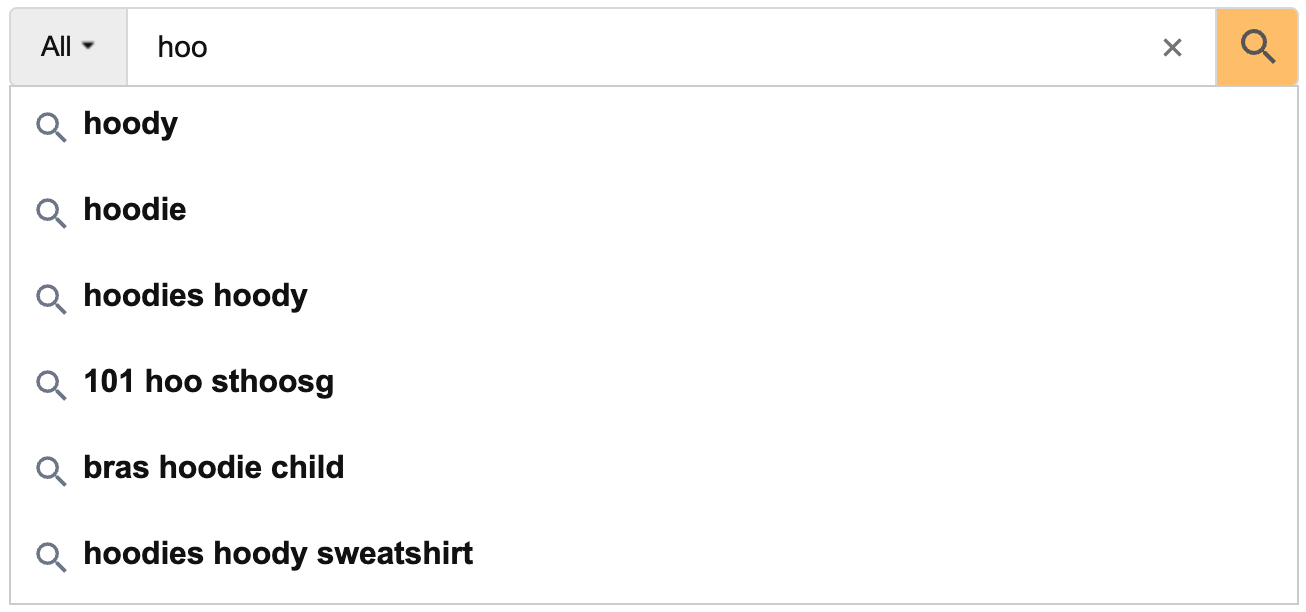
3. Search Results List
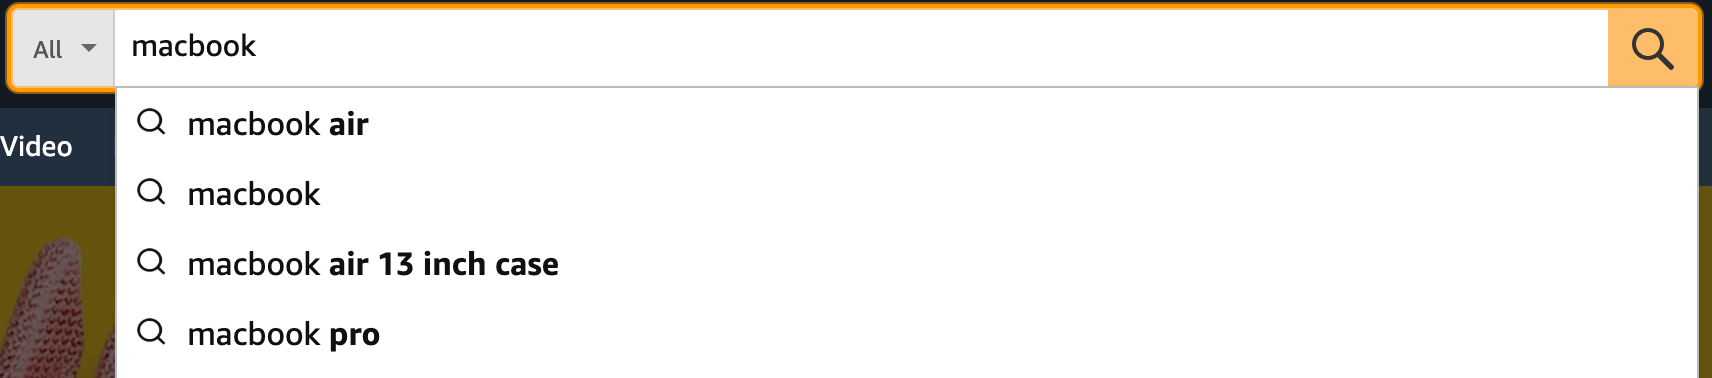
This is the most interesting part. Amazon’s live search results are not a list of products but a list of search suggestions based on the current query.
Example: if we type “macbook” it will show suggestions like “macbook,” “macbook air,” “macbook pro.”
Clicking on any of these suggestions redirects users to the search results page for that query.
We will reproduce the same behavior—showing search suggestions instead of product results and redirecting users to the appropriate search results page after clicking a suggestion.
Note: This article does not cover how to create an Amazon-like search results page, only the search form. That may be the topic of a future article.
Start Building Amazon-like Search Form
Now that we’ve analyzed Amazon’s search form and its elements, it’s time to build our own version.
Note: To create an Amazon-like search form, we’ll use features like search form filters and search suggestions. These features are only available in the PRO version of the plugin. So you need Advanced Woo Search PRO to get the same results described here. The free version can provide some similar visual elements but lacks technical capabilities.
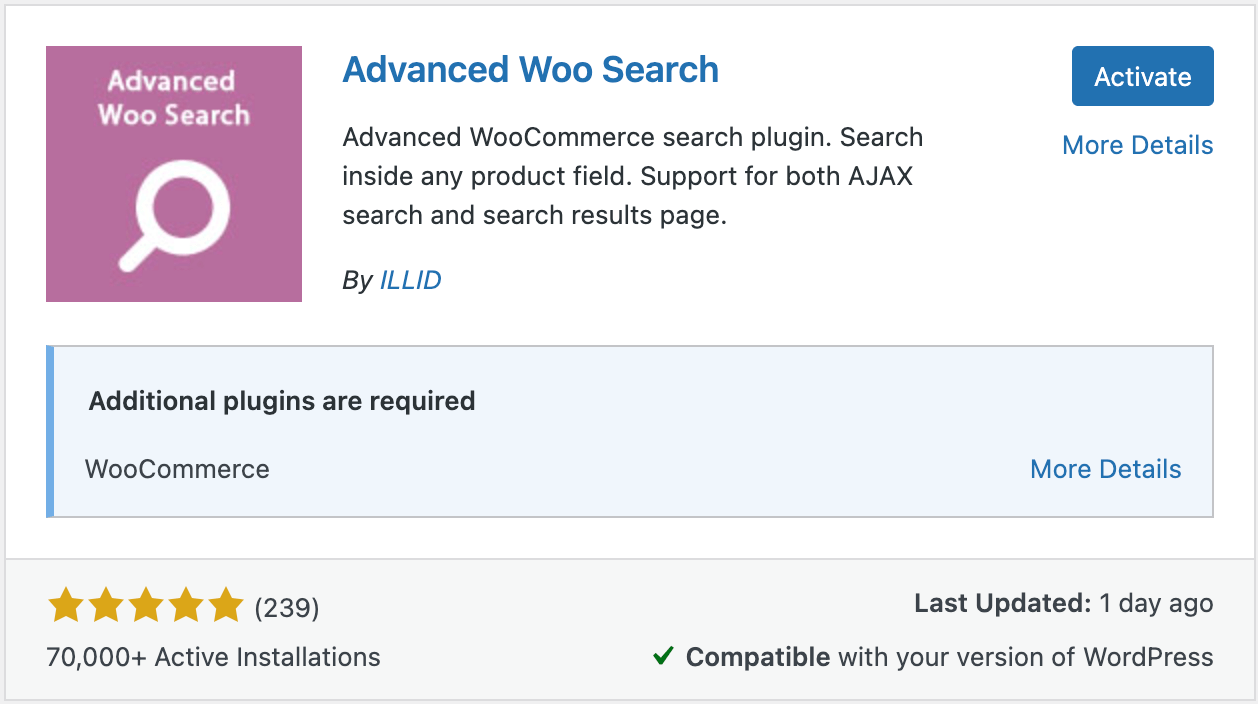
Step 1. Install and Activate the Advanced Woo Search Plugin
First, install and activate the Advanced Woo Search plugin.
You can download it from the WordPress.org repository (free version) or from the customer portal/email (PRO version).
Detailed steps on plugin installation and activation are described here: Installation Guide
Step 2. Configure Plugin Settings
Now, let’s properly configure the plugin so it behaves like Amazon’s search engine.
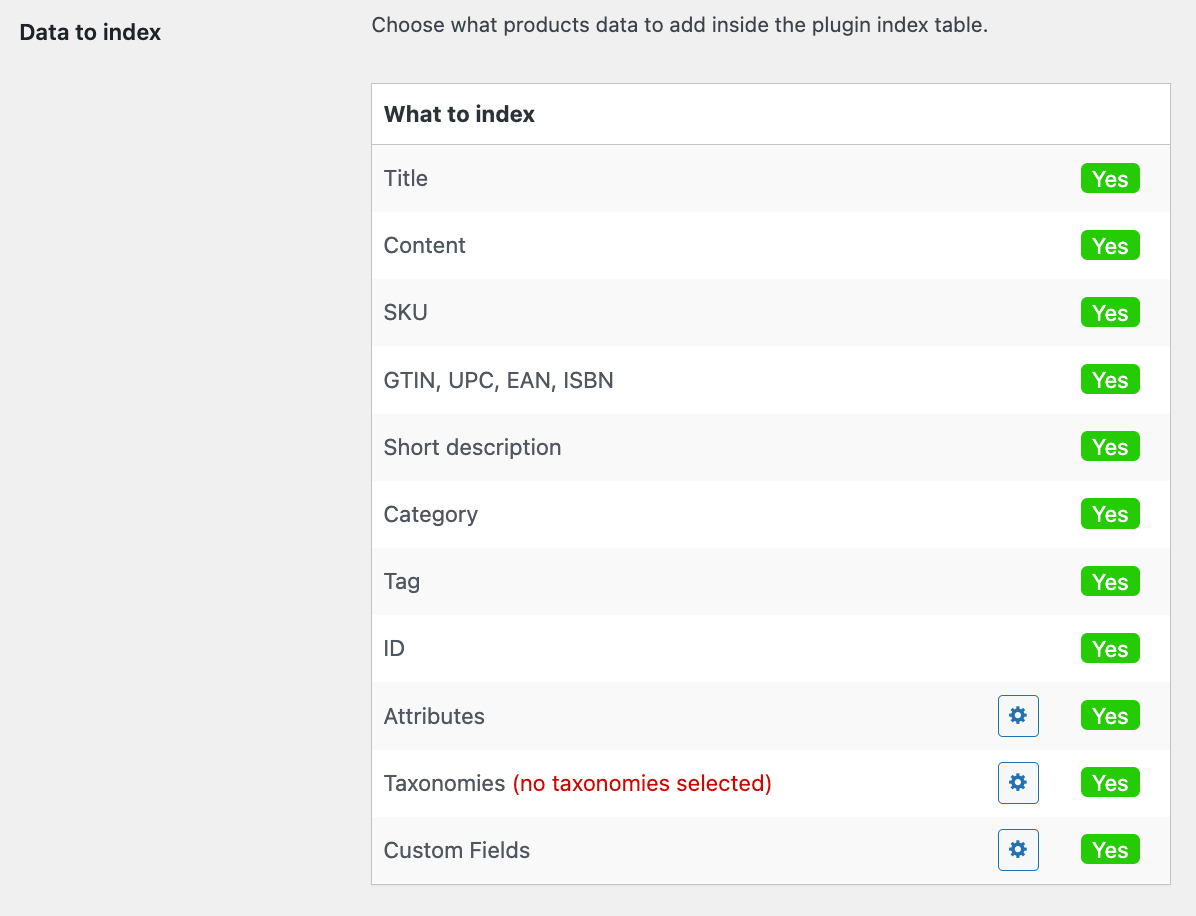
- Go to plugin settings → Performance tab. Here you’ll find settings related to search performance and the index table.
- For Data to index, enable only Title and Category. Other fields are not needed.
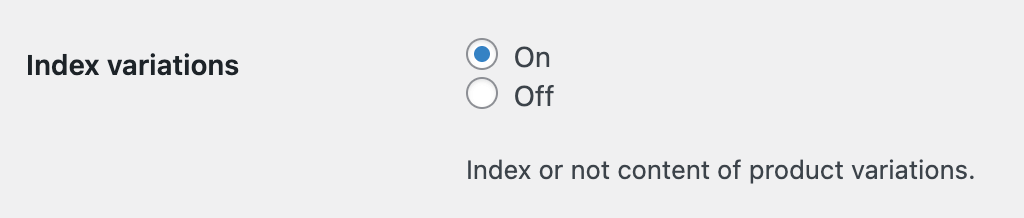
- Disable Index variations.

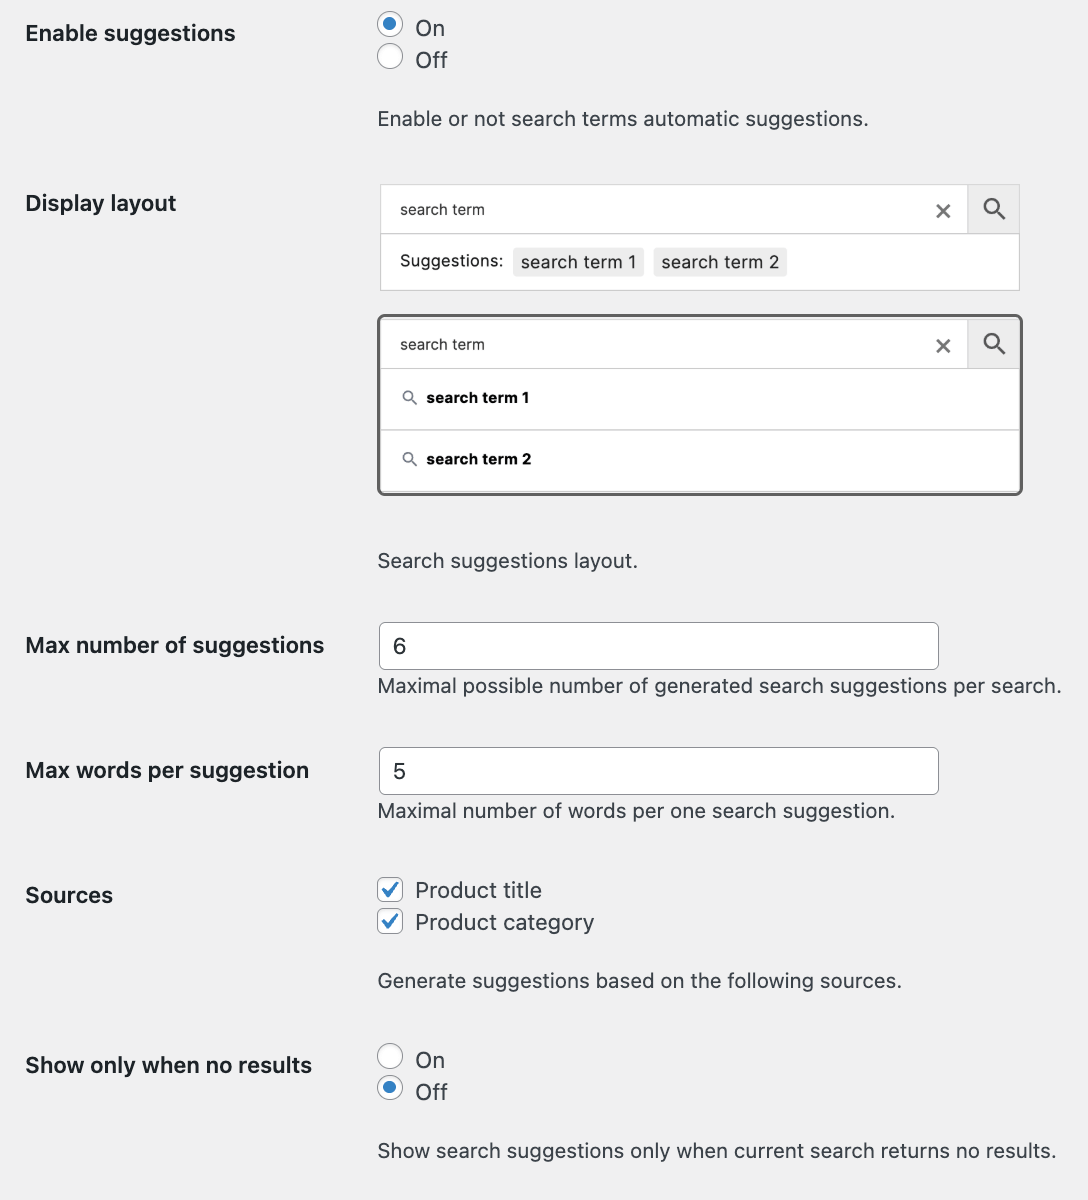
- Enable suggestions: ON
- Display layout: second option
- Max number of suggestions: 10
- Max words per suggestion: default (5) or as preferred
- Sources: Product Title and Product Category
- Show only when no results: OFF
- On click: Redirect to the search page
- AJAX search: ON
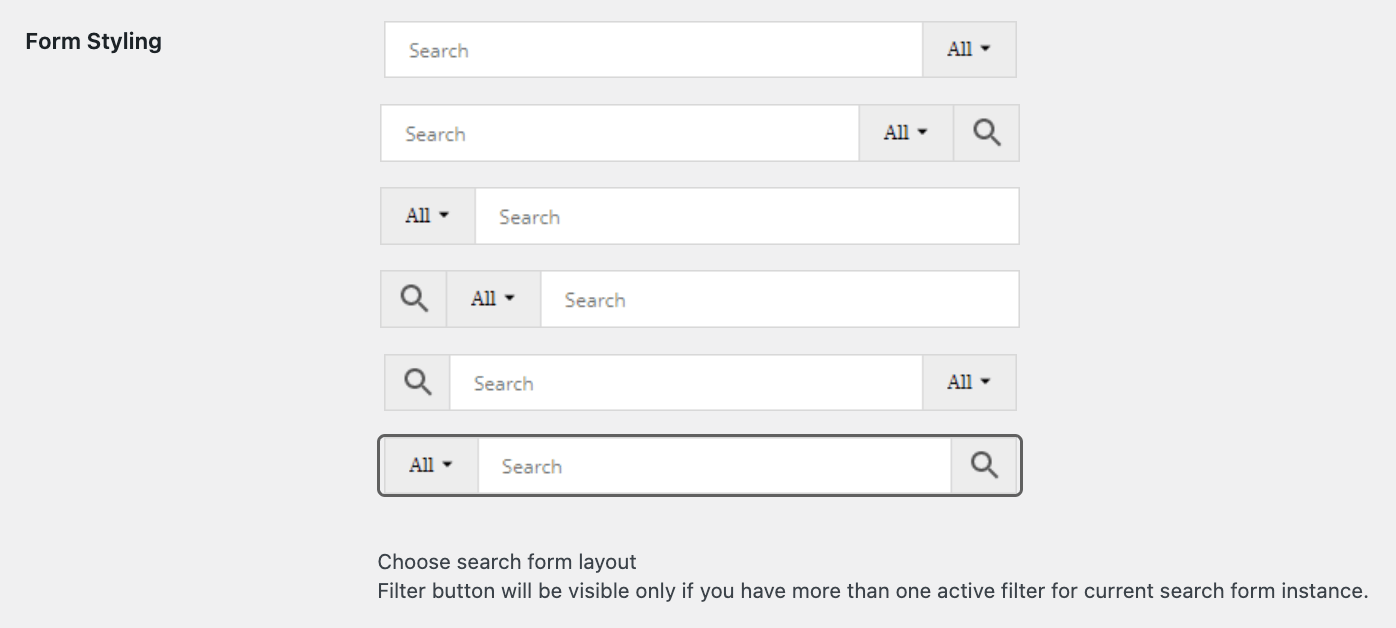
- Form Styling: last variant
Now that we’ve covered basic plugin settings, let’s move on to configuring filters.
Step 3. Create Search Form Filters
Now it’s time to configure the filters, just like on Amazon’s store.
We’ll create filters based on WooCommerce product categories. With Advanced Woo Search PRO, you can build any type of filter, but for this example, we’ll stick with categories.
- Go to plugin settings → Search Form → Search Results tab.
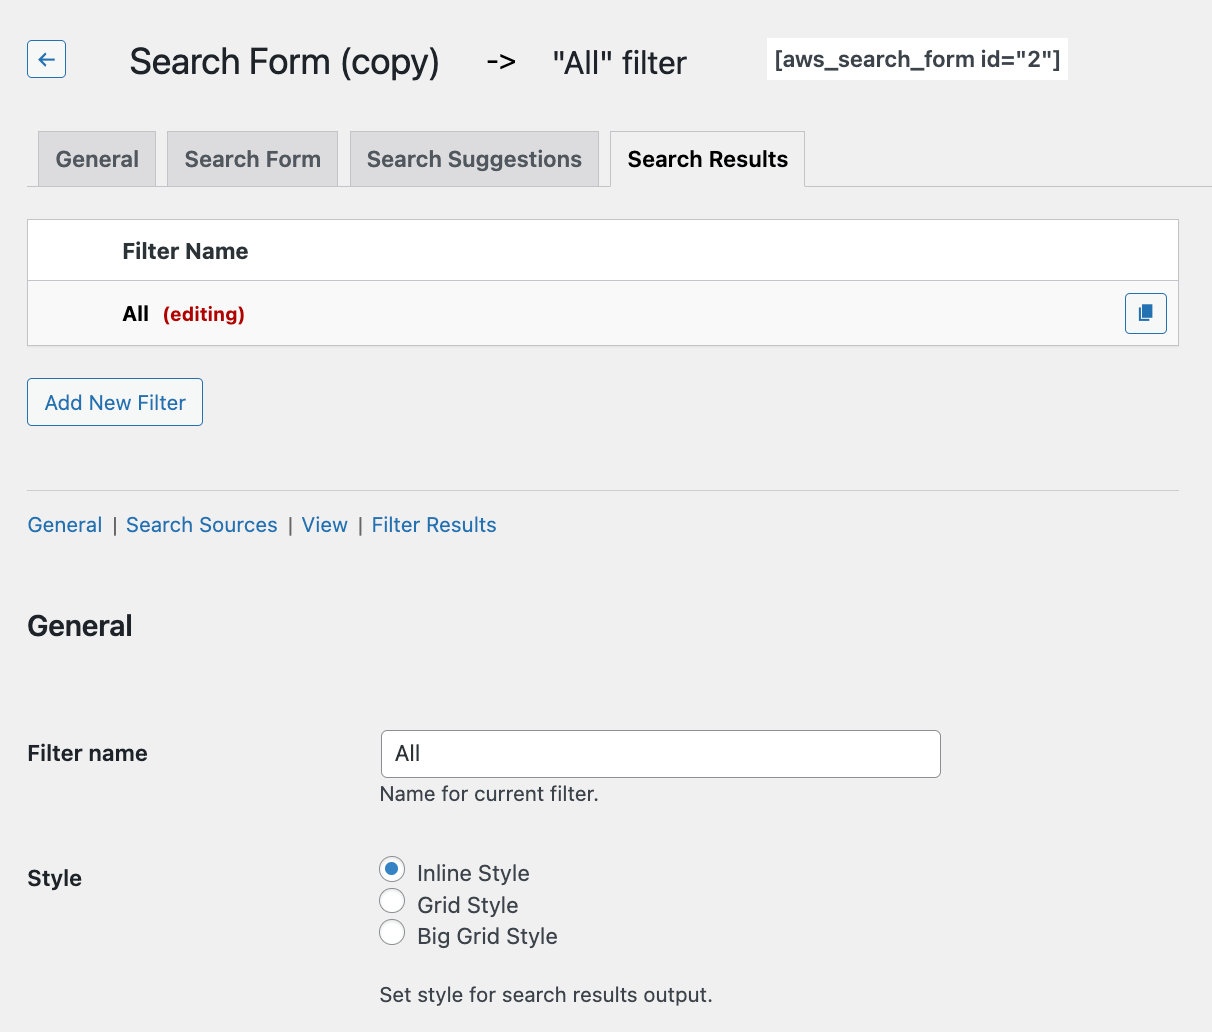
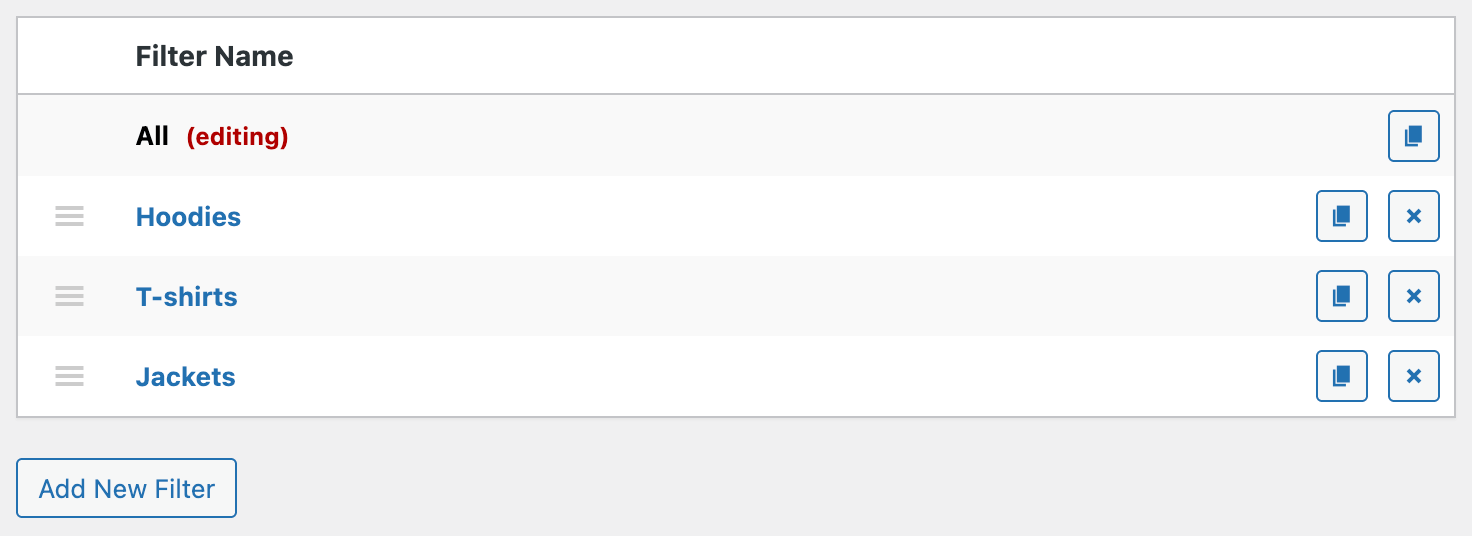
For the default filter:
- Filter name: All
- Style: Inline Style
- Search in: disable all sources
- Archive pages: disable everything

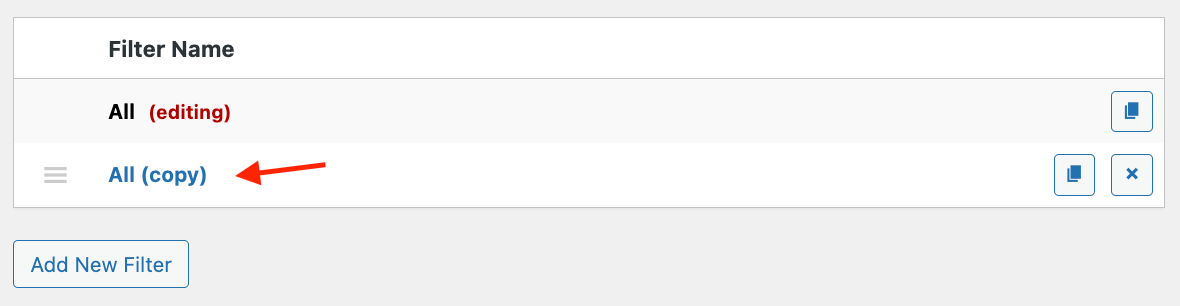
Open the copied filter and rename it based on the category it filters (e.g., "Hoodies").
Product category → equal to → {Your category}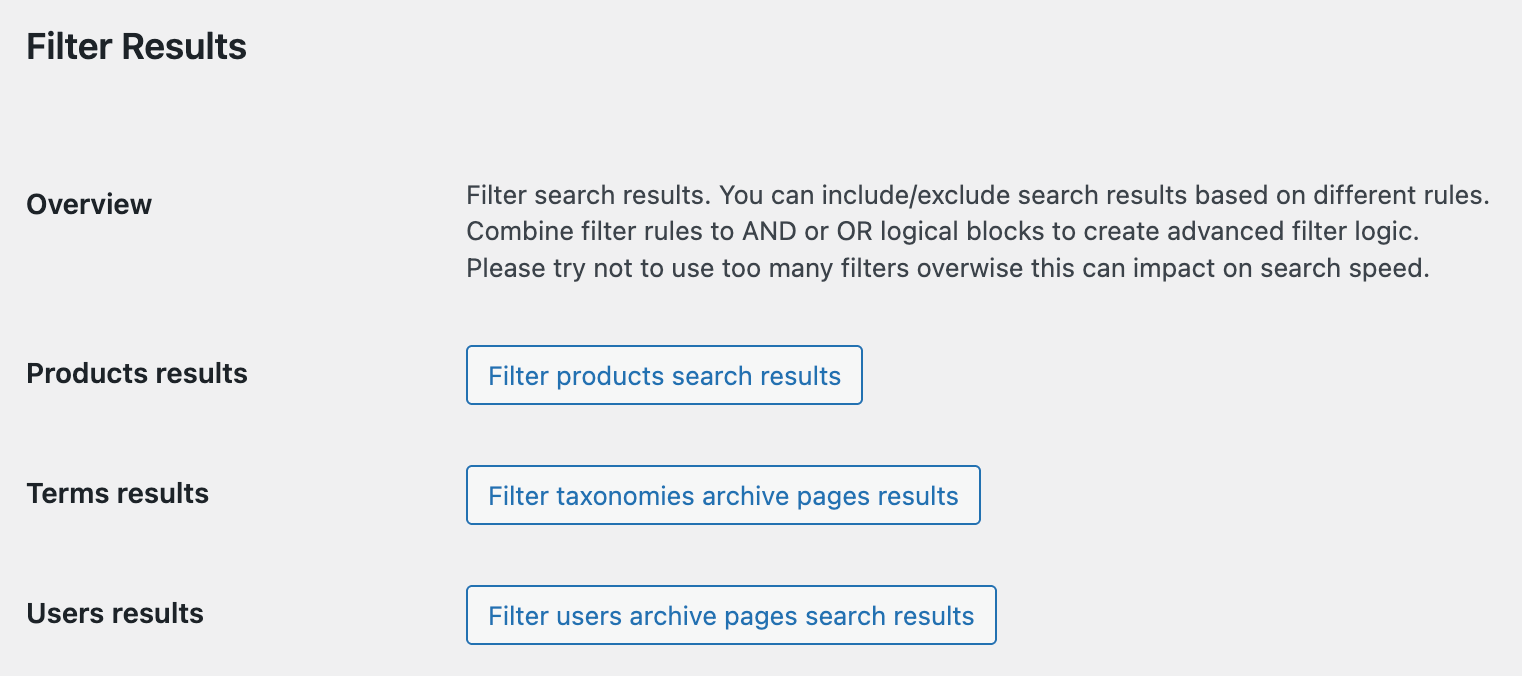

Step 4. Customize Search Form Styles
Now that we’ve set up the plugin and filters, let’s make the search form visually similar to Amazon’s.
Add the following CSS to your theme’s style.css file or use the WordPress Customizer:
.aws-container .aws-search-form .aws-search-btn.aws-form-btn {
    border-top-right-radius: 4px !important;
    border-bottom-right-radius: 4px !important;
    background-color: #febd69;
}
.aws-container .aws-search-form .aws-search-btn.aws-form-btn:hover {
    background-color: #e3a659;
}
.aws-container .aws-search-form .aws-main-filter.aws-form-btn {
    border-top-left-radius: 4px !important;
    border-bottom-left-radius: 4px !important;
}
.aws-container .aws-search-field {
    font-size: 15px !important;
    font-family: Arial, sans-serif !important;
    color: #111 !important;
}
.aws-container .aws-search-form .aws-main-filter .aws-main-filter__current {
    font-size: 14px !important;
    font-family: Arial, sans-serif !important;
    color: #111 !important;
}
[pic - Advanced Woo Search plugin search form with updated styles]
Step 5. Customize Search Results View
Finally, let’s make search suggestions look like Amazon’s.
Use this CSS:
.aws-search-result .aws_result_head {
    font-size: 16px !important;
    font-family: Arial, sans-serif !important;
    color: #111 !important;
}
.aws-search-result .aws_results .aws_result_item {
    border: none !important;
    padding: 10px 10px;
}
.aws-search-result .aws_result_top_custom_item_s_suggest .aws_result_head img {
    width: 21px !important;
}

Step 6. Final! Check Your Search Form
You’re done! Now take a look at what you’ve built:
Conclusion
In this article, we learned how to build a search form similar to Amazon.com using the Advanced Woo Search PRO plugin.
This search form includes:
- Filters to limit search results by category
- Live search suggestions based on your shop’s products
- Search results page shown after clicking the submit button
- Amazon-style design for the search form and suggestions
Overall, this article is helpful for anyone looking to build an Amazon-like search form or implement specific features such as suggestions, filters, and live results.
Trackbacks